Azure Data Factory - Copy files from SharePoint to Azure Data Lake Storage
When you need to copy files from SharePoint to the Azure Data Lake, you’ll find yourself in a more difficult position than you might expect. Even though SharePoint is Microsoft, smooth integration isn’t just the case. But don’t be afraid, it will work. In this blog post, we walk through the steps to make it work.
The following steps are necessary:
- Create App registration in Azure Portal
- Grant the App registration permission to your SharePoint site
- Create ADF pipeline
1. Create App registration in Azure Portal
Before you create an ADF pipeline, you need an app registration that has permission to your SharePoint site.
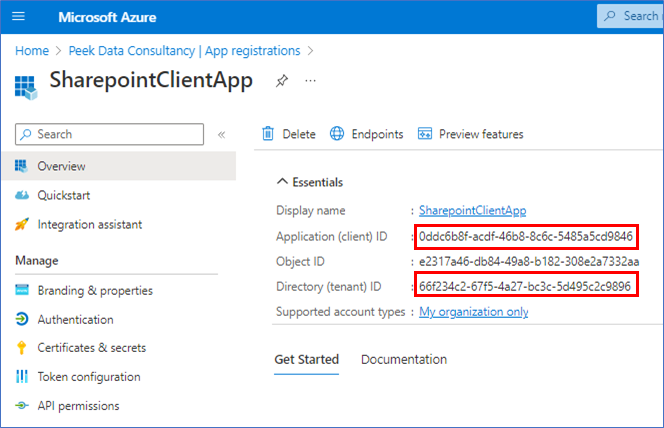
Go to the the Azure Active Directory (AAD) in the Azure Portal, click App registration and then + New registration.
Give you app registration a name and as Redirect URI, select Web and enter https://localhost.com.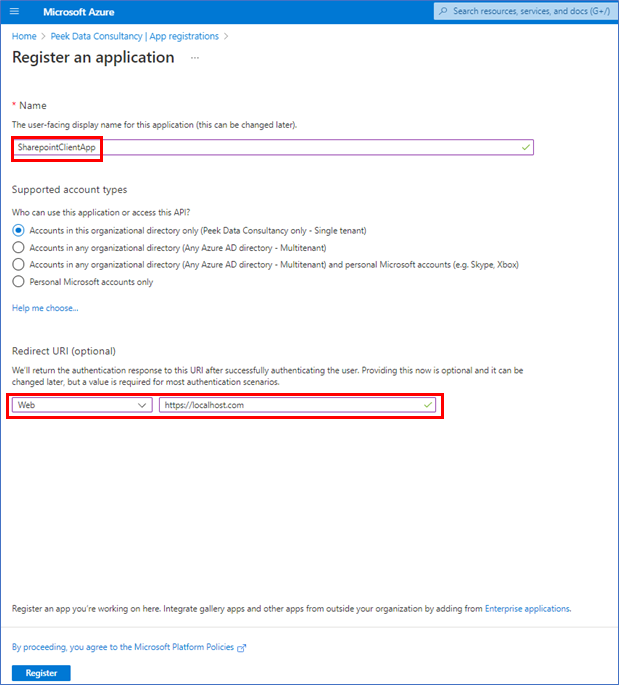
Go back to your app registrations where you’ll find your new app. Click on this app.
Now, we need a client secret so, click Certificates & Secrets and then + New client secret.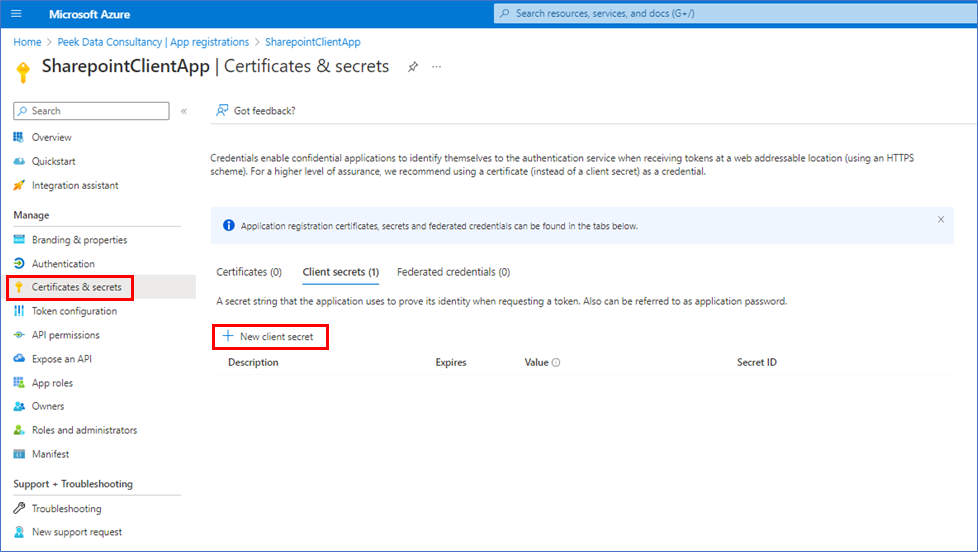
Give the key a description and the validation period. Then click Add.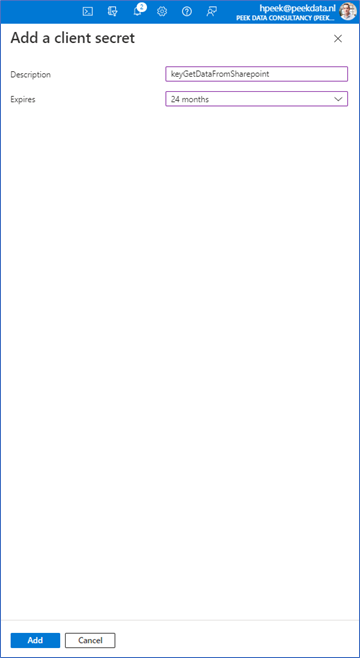
You get a secret value that is only shown once. So, copy the value and store it in a safe place, like Azure Key Vault.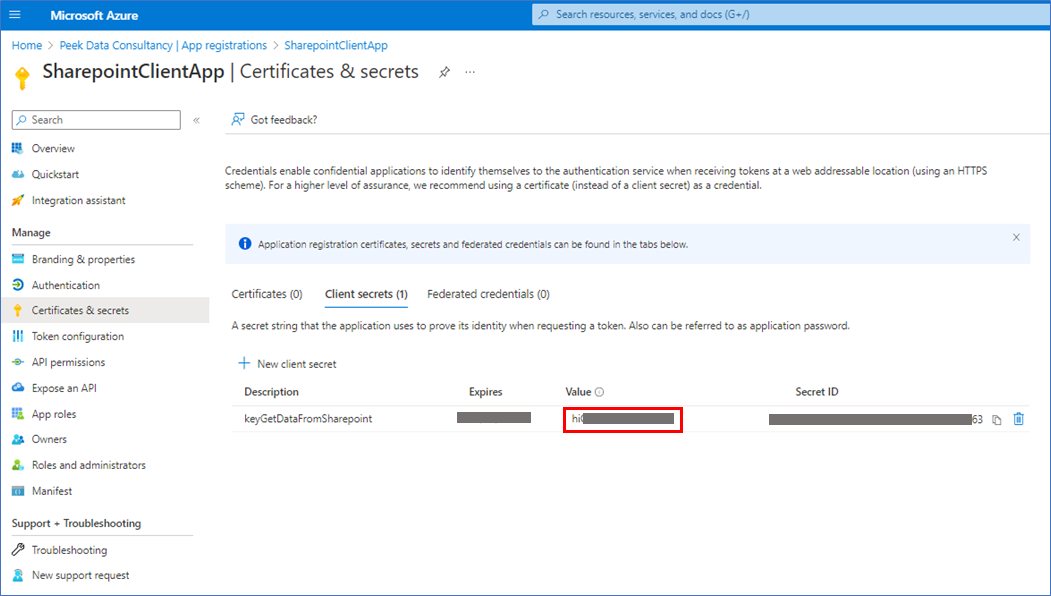
2. Grant the App registration permission to your SharePoint site
The new app registration needs permission on the SharePoint site. To do this, go to https://[site_url]/_layouts/15/appinv.aspx where you replace [site_url] with your tenant and site name. In my case:
- https://peekdata.sharepoint.com/sites/PeekDataConsultancy/_layouts/15/appinv.aspx
Use the following values:
- App Id: Application ID from the previous step
- Title: Name of the app registration
- App Domain: localhost.com
- Redirect URL: https://localhost.com/
- Permission Request XML:
<AppPermissionRequest Scope=”http://sharepoint/content/sitecollection/web” Right=”Read”/>
</AppPermissionRequests>
Click Create.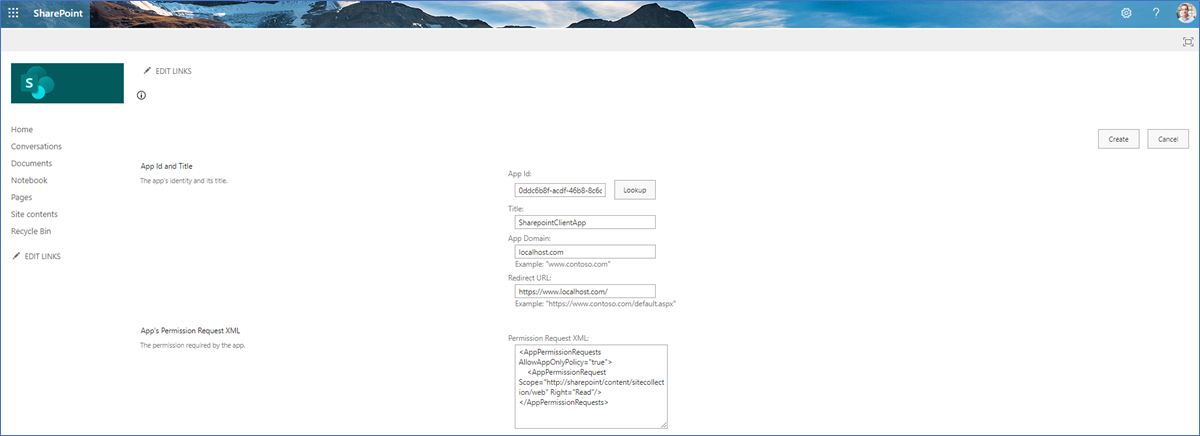
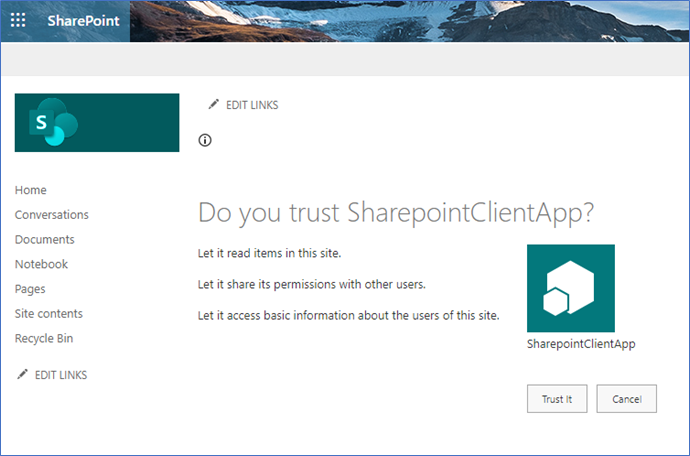
3. Create ADF pipeline
In our pipeline, we need the following artifacts:
- 2 linked services (HTTP and ADLS Gen2)
- 2 datasets (I’ll copy a CSV-file from SharePoint to ADLS so, I need 2 dataset both of type DelimetedText)
- 1 pipeline with 2 activities
- Web activity to get the access token
- Copy data activity to copy the file
Linked services
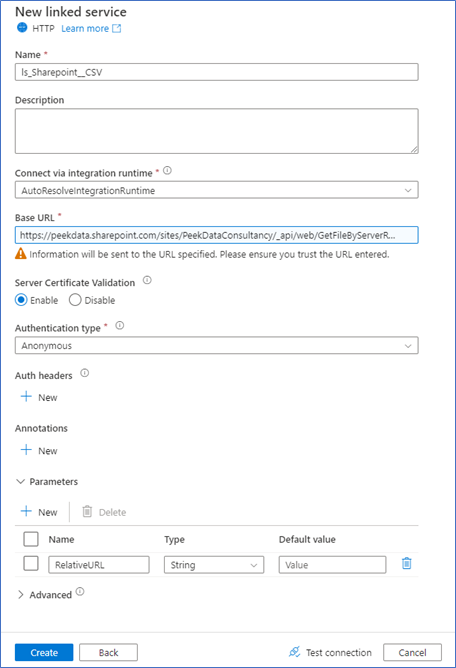
Create a HTTP linked service and add the following properties:
- Name
- Integration Runtime (use default)
- Base URL: https://[site_url]/_api/web/GetFileByServerRelativeUrl(‘@{linkedService().RelativeURL}’)/$Value
- e.g. https://peekdata.sharepoint.com/sites/PeekDataConsultancy/_api/web/GetFileByServerRelativeUrl(‘@{linkedService().RelativeURL}’)/$Value
- Authentication type: Anonymous
- Parameter: RelativeURL
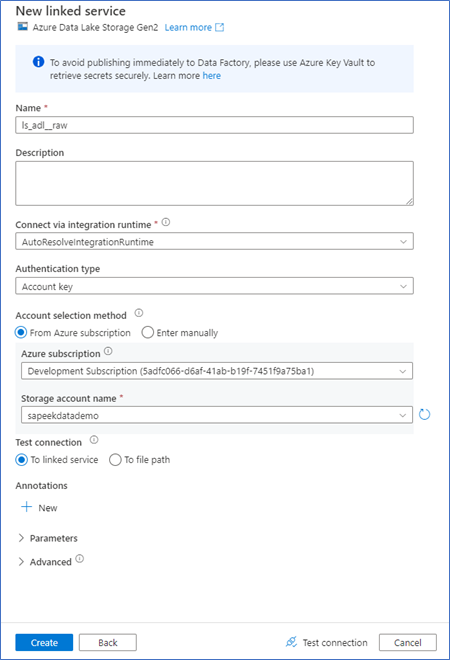
Create an ADLS Gen2 linked service and add the following properties:
- Name
- Integration Runtime (use default)
- Authenticationtype: Account key
- Account selection method: Select your storage account here
Datasets
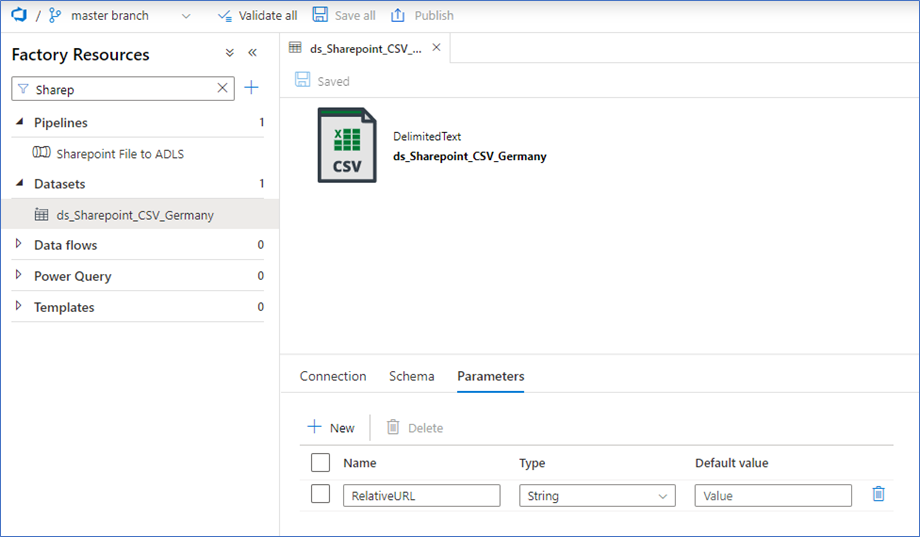
Create a DelimitedText dataset for your source file on SharePoint. Select the HTTP Linked Service and create a parameter on the dataset with the name RelativeUrl (see second image). This parameter is used to fill the RelativeUrl-parameter for the Linked Service. (@dataset().RelativeUrl). This way you can pass the Url of the file from the copy-activity via the dataset to the Linked Service.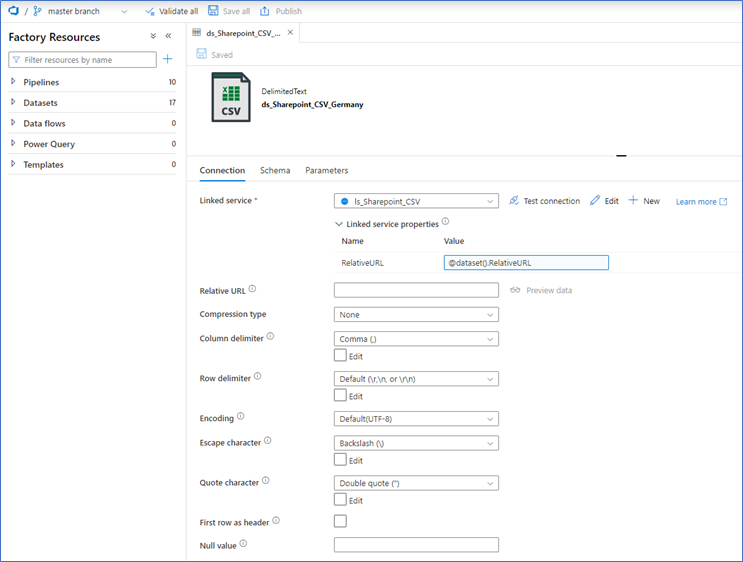
The other dataset is for the ADLS Gen2 location. For this example, I selected an explicit filepath. This will be more dynamic in production use cases, but I’ll leave that out of scope of this blog. Select your destination path here.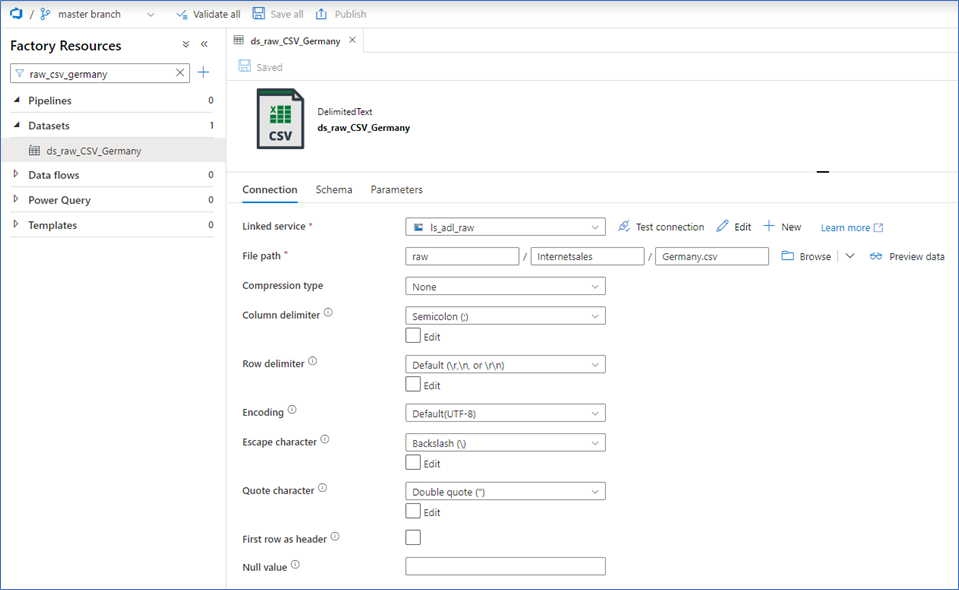
Pipeline
Now, we can create our pipeline! This pipeline has 2 activities, 1 to authenticate and get the access token, 1 to copy the file.
Add a Web activity and a Copy data activity to the canvas.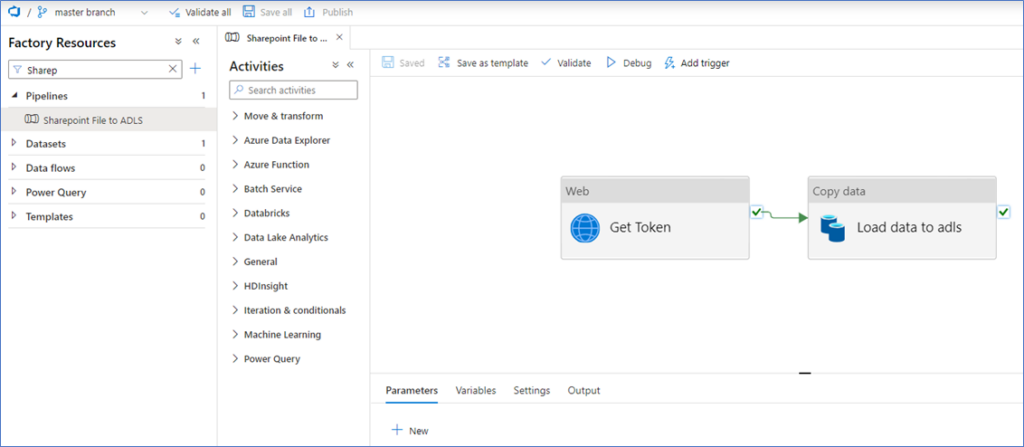
Web activity
On the General tab, enter a name and check the boxes for secure output and input. This makes sure that no information is visible in your pipeline runs (e.g. access token).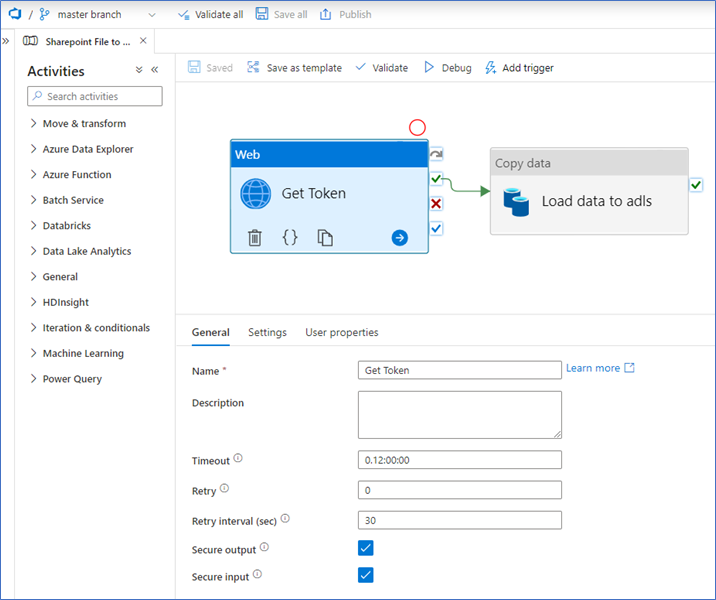
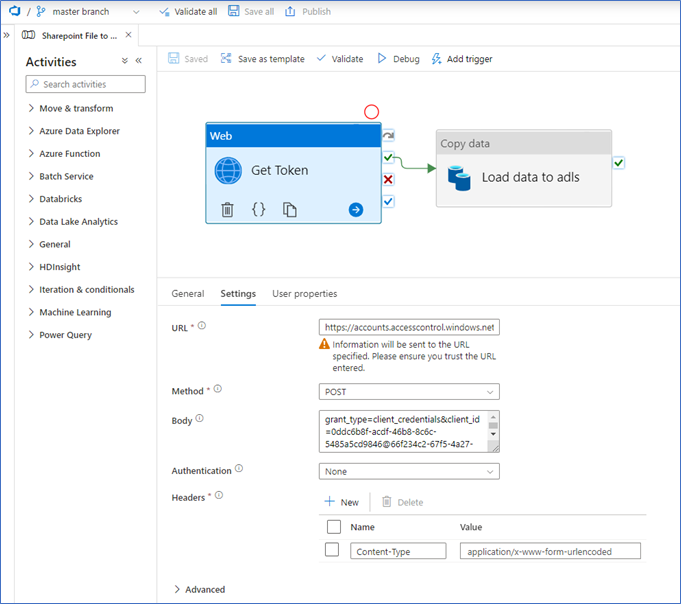
On the Settings tab, enter the following values:
- URL: https://accounts.accesscontrol.windows.net/[tenant id]/tokens/OAuth/2 where you replace [tenant id] with your tenant id.
- Method: Post
- Body: grant_type=client_credentials&client_id=[app id]@[tenant id]&client_secret=[client secret value]&resource=00000003-0000-0ff1-ce00-000000000000/[tenant name].sharepoint.com@[tenant id]
- App id: The application id, see first step.
- Tenant id: The tenant id, see first step.
- Client secret value: The value you copied when you created a client secret to the app registration in the first step.
- Tenant name: The SharePoint domain name, which is part of your site_url you used earlier. In my case peekdata.
- Authentication: None
- Headers
- Content-Type : application/x-www-form-urlencoded
Copy data activity
On the General tab, enter a name and check the boxes for secure output and input.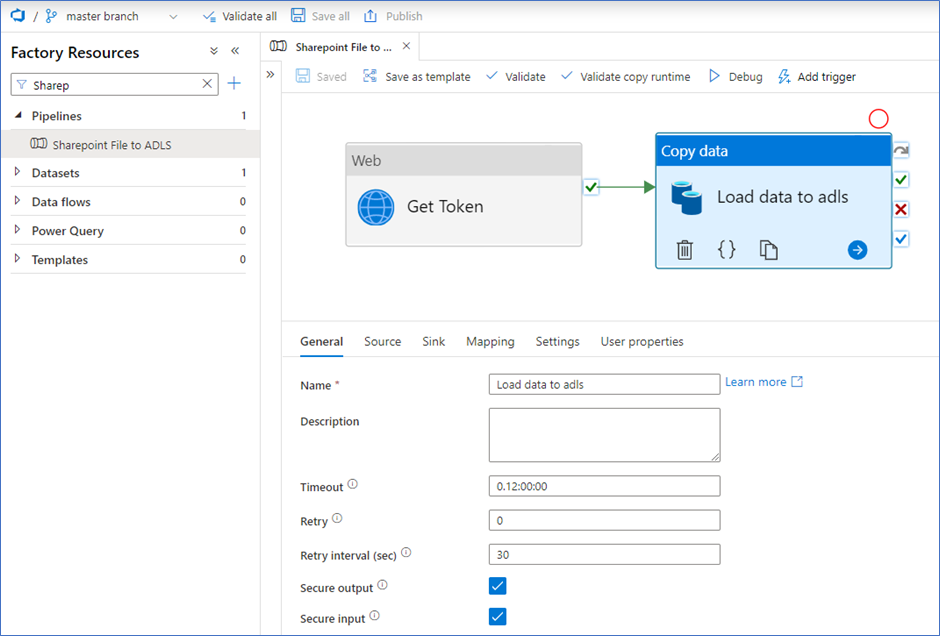
On the Source tab, enter the following values:
- Source dataset: The dataset that’s linked to the HTTP linked service. The dataset needs a value for the Relative Url. This is the path to the file itself. Again, this will be dynamic in most cases, but we’ll keep it hardcoded here. Don’t enter the whole URL-path because we use the function ‘GetFileByServerRelativeUrl’ as we defined in the linked service. Start with ‘/sites/…’. In my case: ‘/sites/PeekDataConsultancy/Gedeelde%20documenten/General/Germany.csv‘.
- Request method: Get
- Additional headers: @{concat(‘Authorization: Bearer ‘, activity(‘Get Token’).output.access_token)}
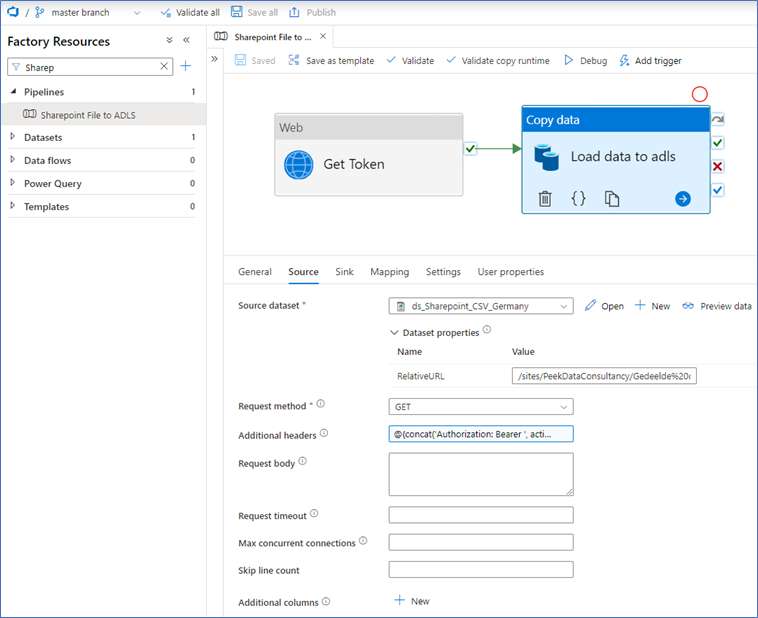
On the Sink tab, you can select the dataset that’s linked to the ADLS linked service. Because we defined the whole path in the dataset, this is all we have to do.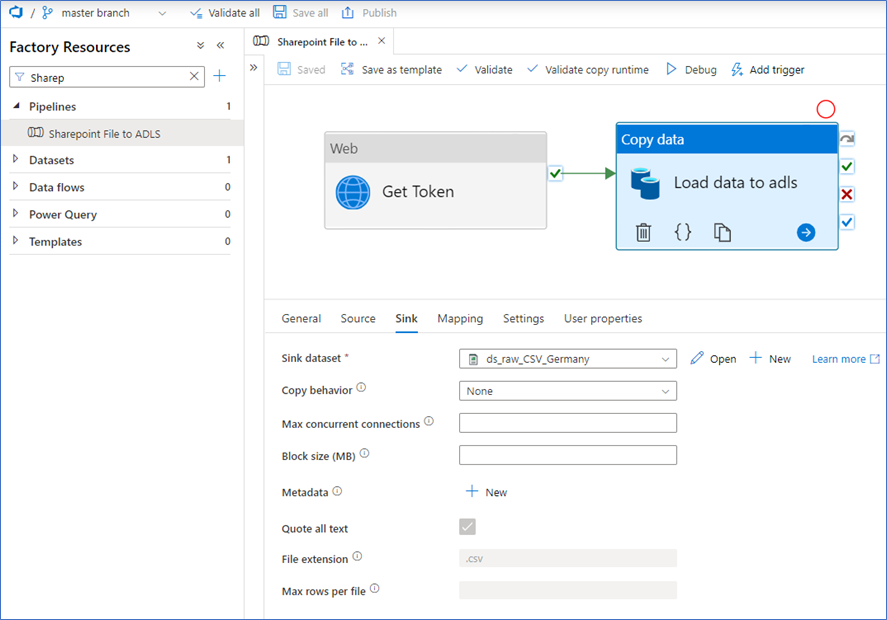
Now, you can click Debug to execute the pipeline.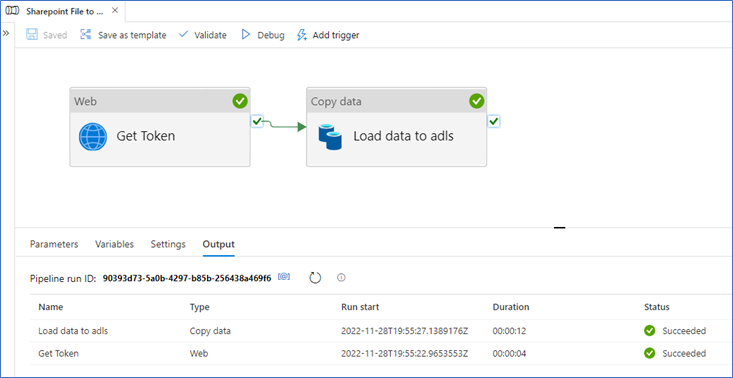
Token type is not allowed
You might get this error message when you try to copy the data from the SharePoint source: error: “error”: “invalid_request”, “error_description”: “Token type is not allowed.”. This is confusing because everything is set up, but luckily, this can be resolved by changing a setting in your SharePoint environment.
- You need to download and install the latest SharePoint admin PowerShell.
- Connect with your admin account to SharePoint admin environment.
- Command: Connect-SPOService -Url https://[tenant name]-admin.sharepoint.com
- Disable custom app authentication
- Command: Set-SPOTenant -DisableCustomAppAuthentication $false

