Use Azure Pipelines for automated deployment of Power BI files
During the development of BI-solutions most of the sources are well maintained: central source location, version control, tracking changes, and automated deployment. Yes, not everything. Most of the time data pipelines, database(s), and analysis service model(s) are controlled with a service like Azure DevOps. Power BI models and reports are often not controlled centrally. There are many reasons why and I did it too. But since I found out how easy it is to integrate your Power BI development process with Azure DevOps, I never create Power BI reports without Azure DevOps anymore. Power BI Premium licenses give you some extra features like deployment pipelines. That’s great, but for many organizations, a premium license is like buying a Ferrari when you need a bicycle. So, in this blog series of 4 posts, I’ll show you how you can improve your Power BI development process big time with just some small steps using Azure DevOps. And you only need a Power BI pro license. In this fourth blog post, we’ll create an Azure pipeline that executes a PowerShell script, stored in Azure DevOps repos.Prerequisites
- The Power BI file you want to deploy. This file is uploaded to Azure DevOps as part of your version control strategy. Check out this blog on how you can do that.
- A PowerShell script that deploys the Power BI file to your workspace. An example of this PowerShell script is discussed in this blog. This script is uploaded to Azure DevOps.
Create Azure pipeline
In your Azure DevOps environment go to Pipelines –> Pipelines –> + New Pipeline. 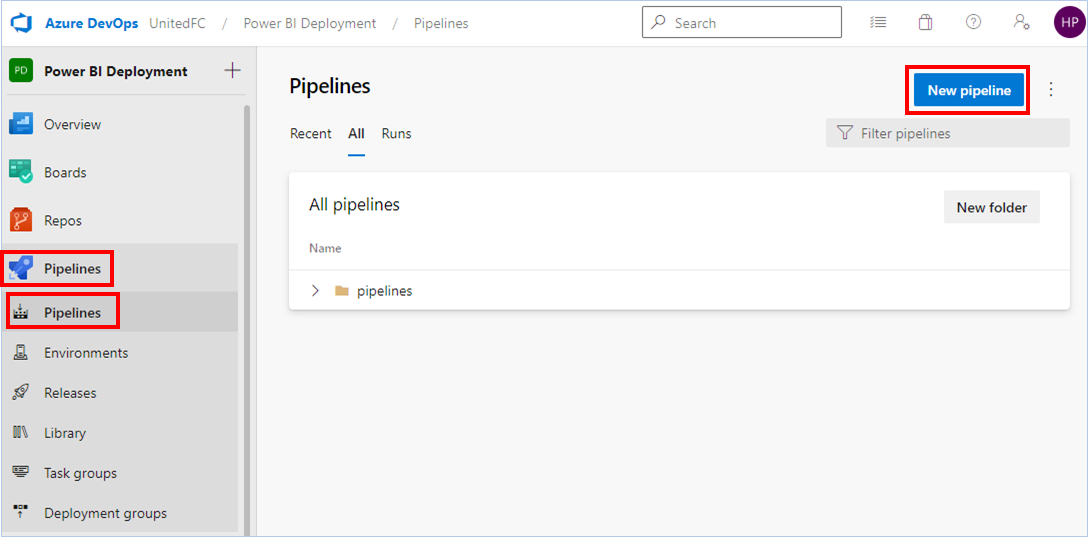
You can build advanced pipelines using YAML. In this case we can easily use the classic editor.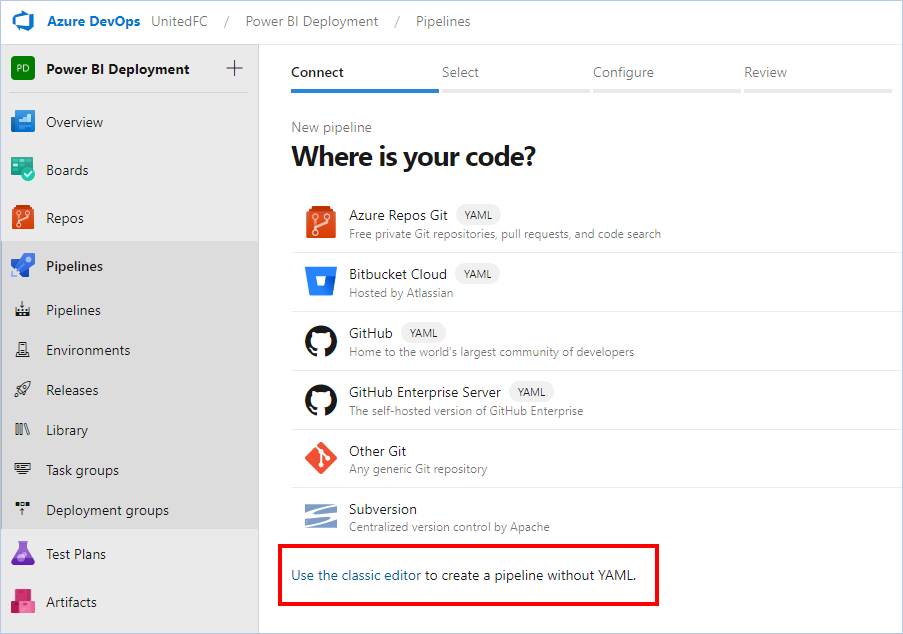
Use Azure Repos Git, and select your Team project, repository, and branch.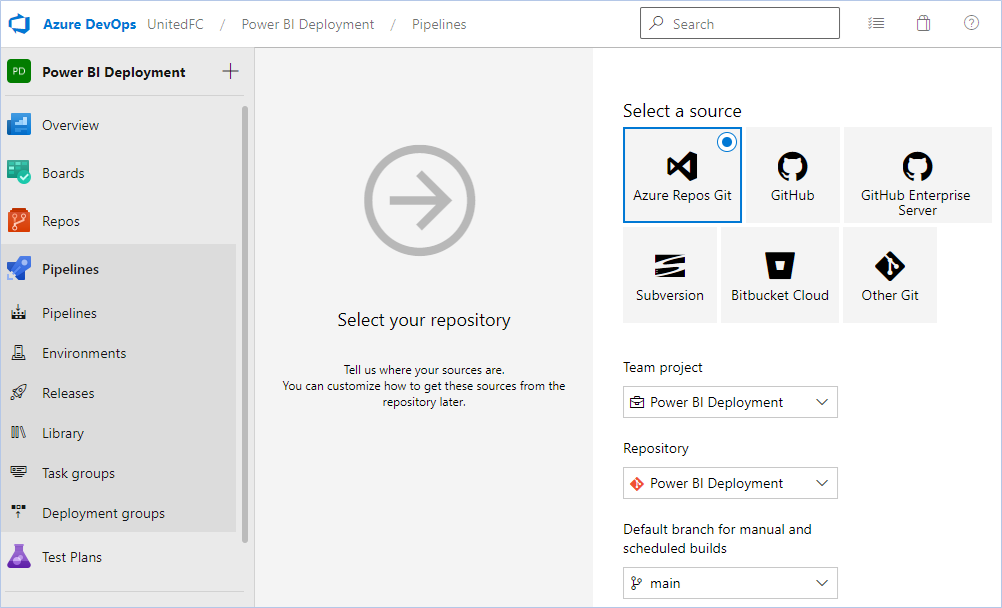
Start with an Empty job.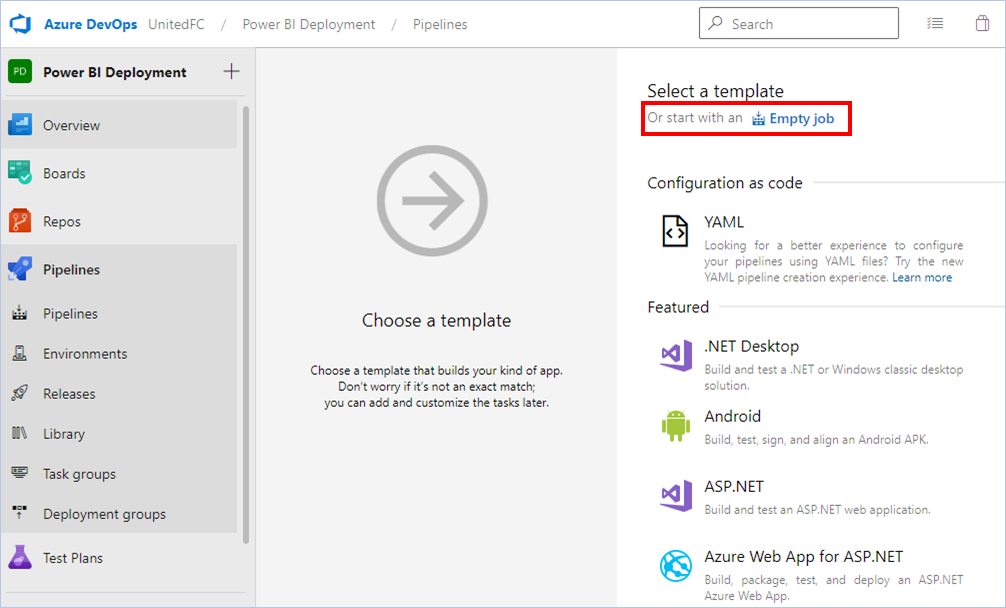
We use variables to make our pipeline more dynamic. This is relevant if you use this release pipeline for different kinds of deployments (e.g. test and production). Click Variables on the top menu.
I’ll execute a PowerShell script that expects 3 input values. For this example, we use this PowerShell script. I’ll explain the script in this blog.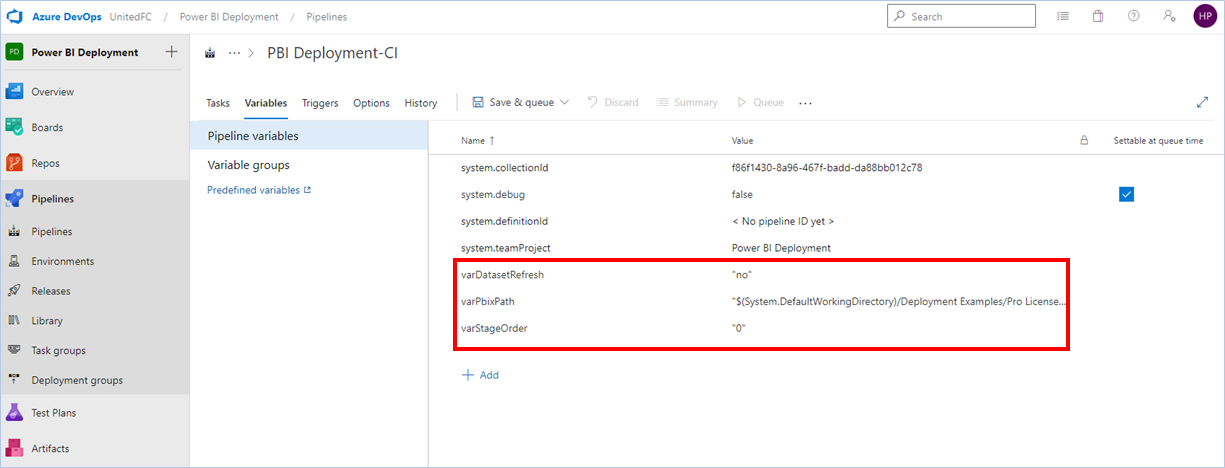
The value for the varPbixPath is: “$(System.DefaultWorkingDirectory)/Deployment Examples/Pro License/PBIX Files/Datamodel Sales.pbix”. ‘System.DefaultWorkingDirectory’ refers to the repo you selected before. The rest of the path refers to the PBIX file location within Azure DevOps.
Click on the + sign next to Agent Job. Search for PowerShell and add the PowerShell task.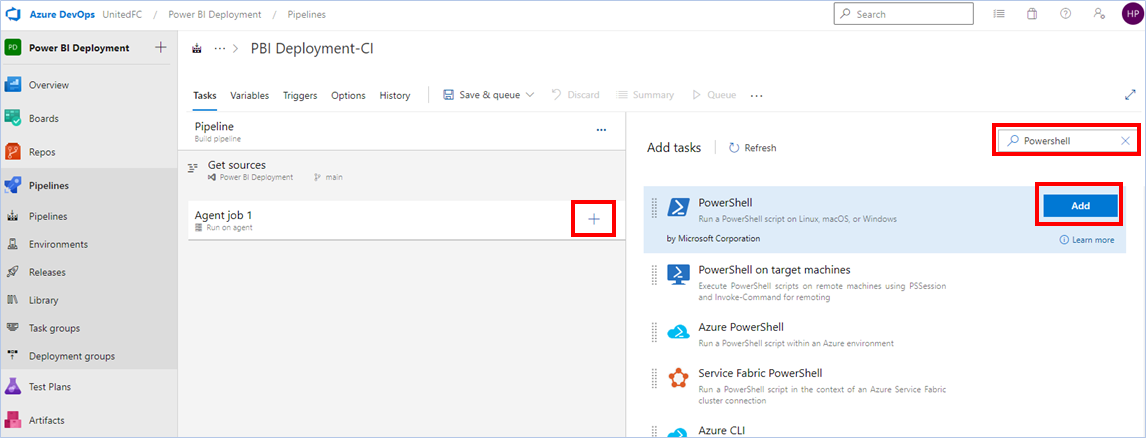
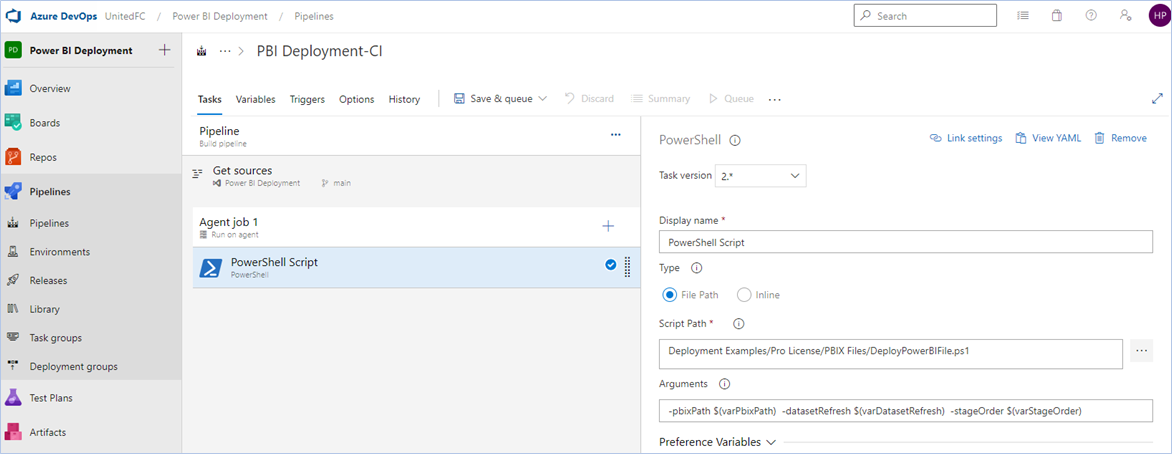
Click Save & queue on the top. The following window appears. Click Save and run.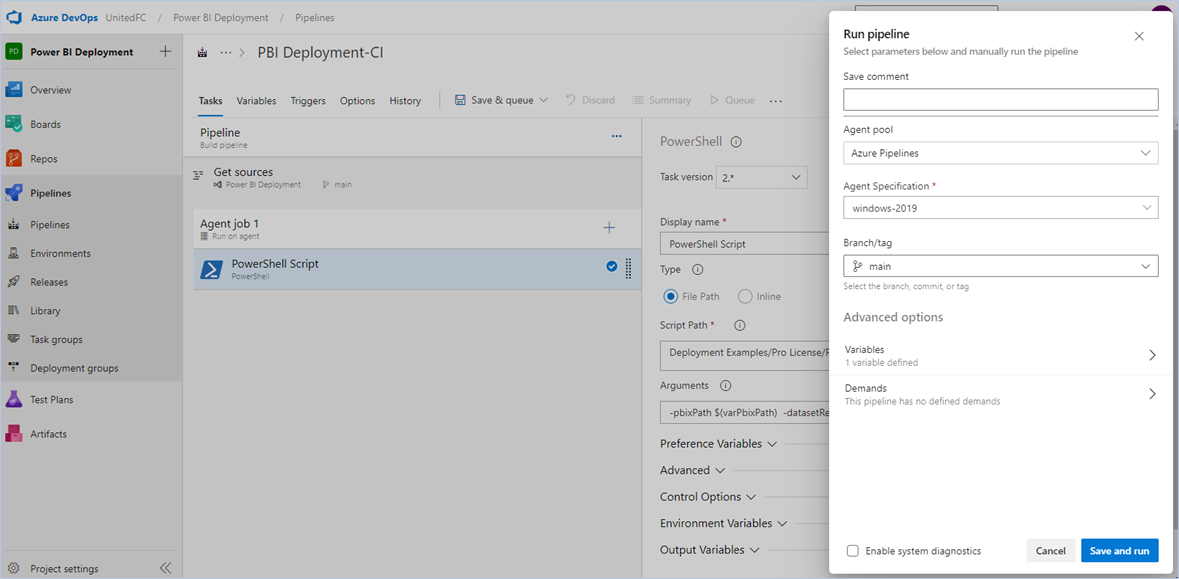
You need to wait for a few minutes (approx 6 min). It starts a VM in the background, which will cost most of the time. When the pipeline is finished, your Power BI file has been updated in your workspace. 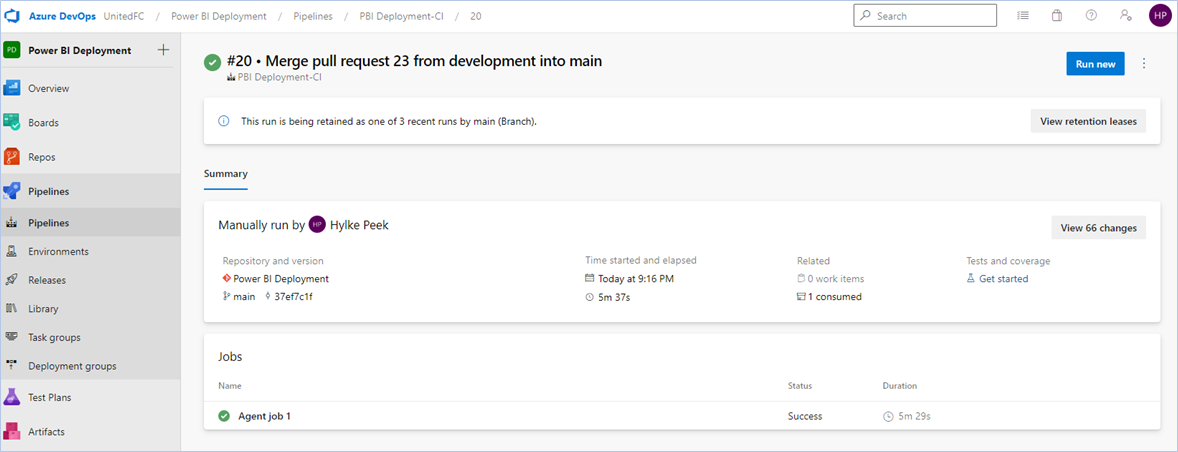
Continuous Deployment
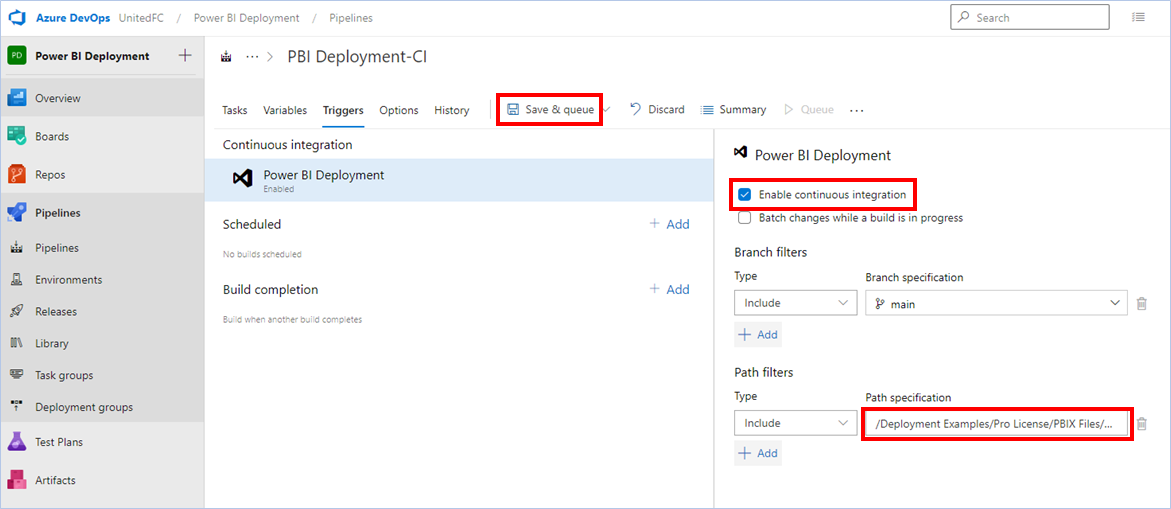
- I use /Deployment Examples/Pro License/PBIX Files/Datamodel Sales.pbix. So, no single or double quotes and starting with a slash. This is different from adding a variable value for a Powershell script. You can assign the whole folder by finishing the path with a slash instead of the filename.
Conclusion
Using the classic editor in Azure pipelines is almost the same as using Release pipelines. So, it’s an easy way to automate your Power BI deployment process. The magic happens in the PowerShell script but with Azure DevOps, you can integrate the script into the deployment.
